Installing L.R. Baggs Element Pickup
 Ok so as you might or might not know I got myself a Journey Instruments OF420 travel guitar as a part of my long term master plan. Read more about the guitar HERE. I am quite picky on my amplified acoustic guitar sound and even when I bought the guitar, even that it came with building pickup, I knew I was going to change it. I have had quite a few of the different pickup systems out there in one of my guitars over the years and even though amplifying an acoustic guitar is kind of never ending task for me, the most happiest I seem to be with L.R. Baggs products.
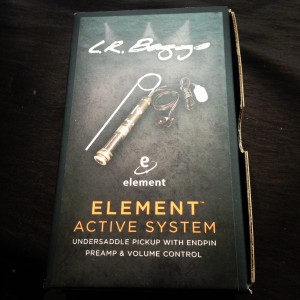 On this guitar I wanted something I would call an idiot proof system, that bit like the guitar it self can travel with me where ever the road takes us, but also deliver the goods when needed. So I decided to go for the L.R. Baggs Element active system. This is an undesaddle pickup that delivers a strong signal and combined with the Planet Waves Feedback buster (a rubber sound hole cover) it works in pretty much any situation.
 So I thought I’ll walk you through the installation. But before I do, let me just point out that if you do install the pickup by yourself, instead of qualified Baggs dealer or professional luthier, you do not qualify for the warranty coverage. This is stated in the package as well. And also let me just remind that if you follow these instructions, you do so by your own choice and I do not take any responsibility of possible damage to your guitar or yourself.
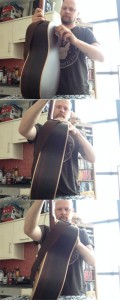 OK, so enough of the legalities, let’s get to it. First of all, the beauty of the Journey Instruments is that the neck comes off. So I had the strings off the body in roughly one minute. Next I removed the existing pickup, which contact elements I had loosened earlier. In the past pickup instalments I had to enlarge the input jack hole in the guitar for example when I was swapping from Fishman Pickup to L.R. Baggs system as the input jack in the Baggs was just a small bit larger. This usually is not a big job and can be done with a file. If you do not have an input jack hole at the end block of your acoustic where the strap button is located, I recommend you get a professional luthier to drill it for you. To my delight the hole was the perfect size.
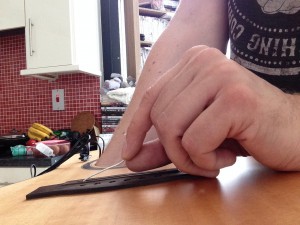
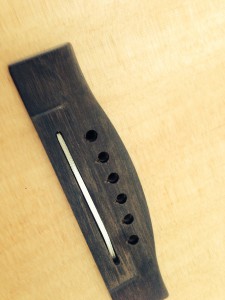
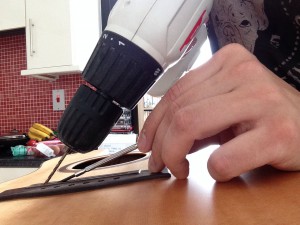 So this is the little bit scary part. You need to drill a small hole in the bass end of your bridge, under where the saddle ends. With L.R. Baggs Element this hole needs to be angled roughly about 45 degrees, as the pickup material is flexible, but sharp edges can damage it. The installation instructions that came with the guitar also had a great tip to use a jewellers flat screwdriver beside the drill bit to protect the rest of the saddle cavity. Also the first 1/8″ (about 3.5 mm) of the pickup does not pick the sound, so I drilled another small hole at the other end of the saddle cavity where I can tuck in this dead spot of the pickup. This second hole does not need to be deep and definitely does not need to go through the body.
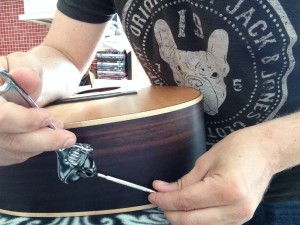
 The next thing was to fish the pickup element through the hole I had drilled. Gently pull it through while feeding with your other hand from the inside of the guitar. I fitted the top of the pickup element in the excess hole at the other end of the pickup. I was also lucky enough that to me the action was just a tiny bit too low to start of with and the thickness of the pickup was just enough to lift the saddle to make the action perfect for my preference.
 But if the pickup brings the action too high for you, just place some sandpaper on a flat surface and sand the bottom of the saddle on it. Go little at the time, as it is easier to sand some more, but if you sand too much, you need to get a completely new saddle…
So next I gently placed the saddle on top of the pickup. The general rule is that you should have a minimum of 50% of the saddle height in the saddle cavity in the bridge, to avoid the saddle from tilting.
After this we go deep into the guitar 😉 Unscrew the strap button, washer and the retaining nut off the output jack (the preamp is also housed in it). Place the larger nut in the input jack and push it through the sound hole and through the jack hole in the tail block to check how much clearance there is. You can adjust the required amount by screwing the nut one way and another.
 Once you make sure there is enough clearance for all of the washers and the strap button place the flat and star washer against the nut on the input jack. Once again push it through the sound hole and through the jack hole in the tail block. Secure the retainer nut from the outside. There is a hole on the side of the input jack.
 Place small jewellers screwdriver through this hole and with it and wrench, tighten the retainer nut. Then place the remaining washer and a strap button and tighten once again. Make sure there is a small bit of the input jack coming out at the end of the Strap button, to make sure you will have a proper connection with your jack to jack lead.
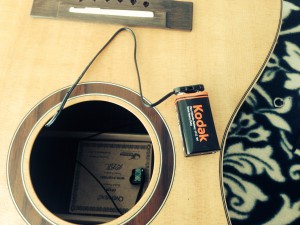 After that all you need to do is place the volume control on the inside of the sound hole, attach a nine volt battery and stick in the holder inside the guitar at the neck blog, tidy up the leads with the provided cable ties and stick them inside the guitar. Oh yeah, restrung your guitar (put the back back on in the case of my Journey Instruments guitar), plug it in and rock!
J.P.
The author J.P. Kallio is a singer songwriter
To get two of his free songs go HERE and click Download
-

-

Enter your info below, and you will immediately be sent EIGHT of J.P.'s
Songs